advertisement
6 August 2024
Our inaugural hovertrain is inching closer to a historic ribbon-cutting ceremony, but first and most importantly, we need to formulate our color scheme for our rail cars!
Is there anything more stressful in our beloved hobby than coming up with a paint scheme for one’s miniatures, scatter terrain, and game tiles?! The indecision and second-guessing can be paralyzing at times.
So, we thought you might want to see our approach to formulating a paint plan in the hopes of giving you an advantage on future anxiety saving throws. 😉
Let’s face it—3D printing is not a cheap endeavor. You have to make calculated decisions to balance monthly subscriptions, filament and resin materials, different paint lines, ancillary supplies, etc. If you spend too much on paint, then your other items suffer. It’s a slippery slope!
We try to save ArmyPainter Speedpaints and Citadel Constrast paints for our miniatures and smaller scatter pieces. For the larger stuff, we use a combination of DecoArt, Apple Barrel, FolkArt, and even Pokorny Paints.
That said, avoid rushing into this critical paint phase. Be patient. Think it through and calculate your efforts.
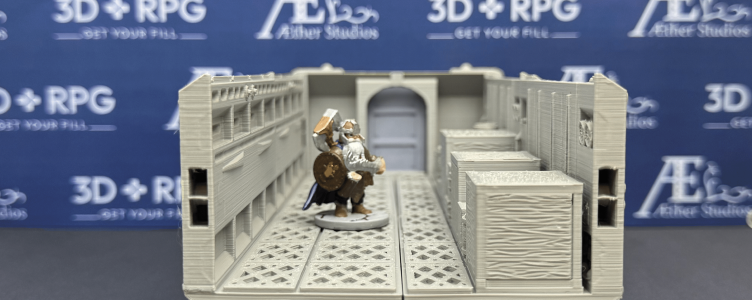
Our hovertrain cars’ interiors are printed and assembled to be fully playable. Think of each one as its own “dungeon room.” Each train car will just be longer and narrower, which better simulates what traveling on a train is really like.
We love how tile designer Aether Studios utilizes d20 squares, which allows miniatures to fit accordingly and for easy movement calculations. If you’re curious about the dimensions, a car will be eight d20 squares long and typically two to three d20 squares wide, depending on its type and whether or not Aether added in any decorative dressing.
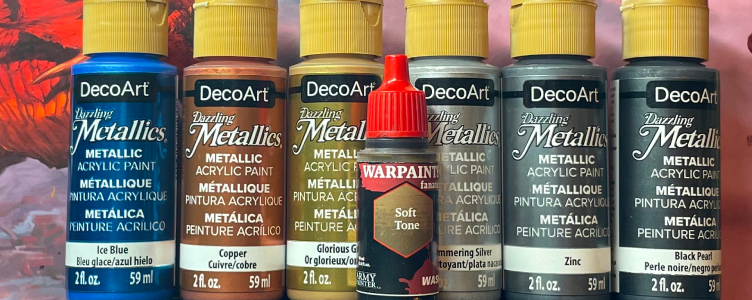
FDM-printed tiles can really absorb a lot of paint, so we knew we had to choose from more affordable acrylic craft-based products, which have a lower price point and come in bigger bottles. DecoArt/Americana have always been solid ancillary acrylic paints, so their brand is a natural pick for our initial tests. We plan to mix in some Pokorny Paints and only use ArmyPainter Speedpaints for small accents.
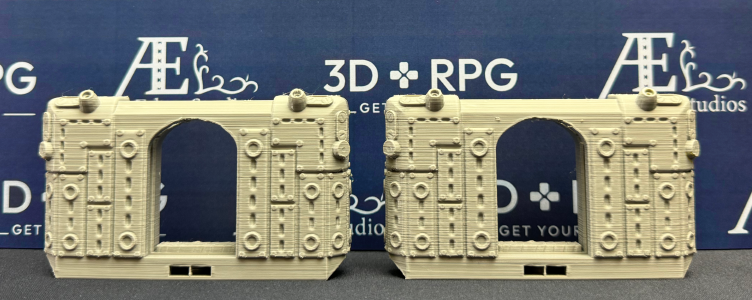
To prepare, we 3D-printed out six different types of train doorframe end pieces with various designs and textures. We then primed them black and did our usual slapchop coverage (a dry brush of grey followed by a dry brush of white).
Next, we’ll apply a base layer of DecoArt metallic paint to the entire front side of the doorframe. Then, we’ll put an ArmyPainter Fanatic Soft Tone wash only on the right side of the doorframe so we can see how the wash affects the original color selection.
We decided to test six of their colors: Black Pearl, Shimmering Silver, Zinc, Copper, Glorious Gold, and Ice Blue.
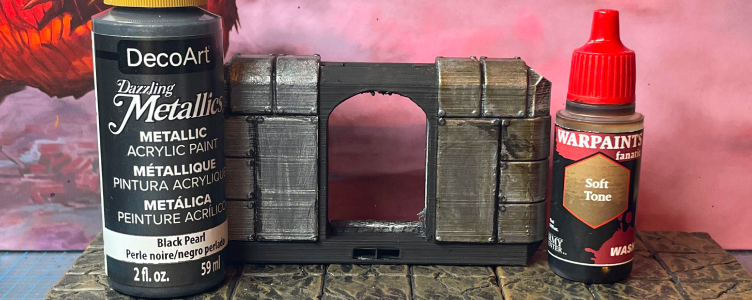
Let’s start with our absolute favorite of this test: Black Pearl! It just has that dirty, industrial feel we’re looking for here, so much so that we don’t even think a wash is needed on top of it.
Side note: We also concluded that applying basic black paint on the door frame and grooves of the piece centers the base color nicely. That contrast looks really sharp!
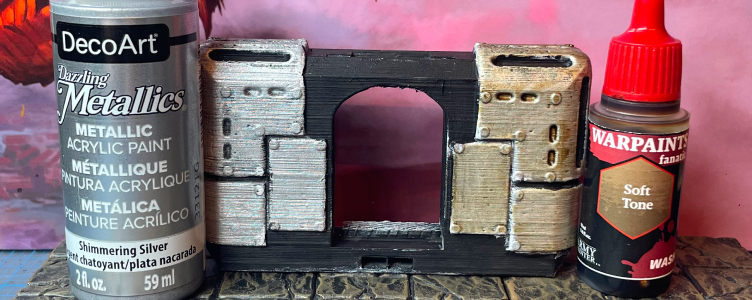
Next, we have Shimmering Silver, and boy howdy, is it shiny. A wash on top of it makes the car look really dirty…like rode-through-a-dust-storm sorta dirty (which could have its place for say, a cargo car). We think Black Pearl as a base and this brighter Shimmering Silver as the primary contrasting accent color is gonna be slick.
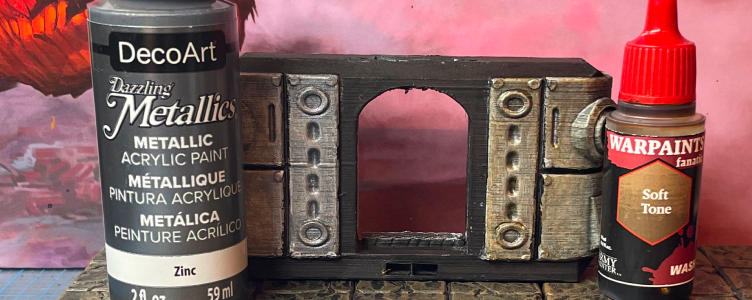
Next up is Zinc. It’s a smidge lighter than Black Pearl, but it takes the wash a bit better. We think Zinc will be a nice secondary accent color to certain train car elements. If putting Shimmering Silver on a spot turns out to be too shiny, then we’ll use Zinc for that contrast.
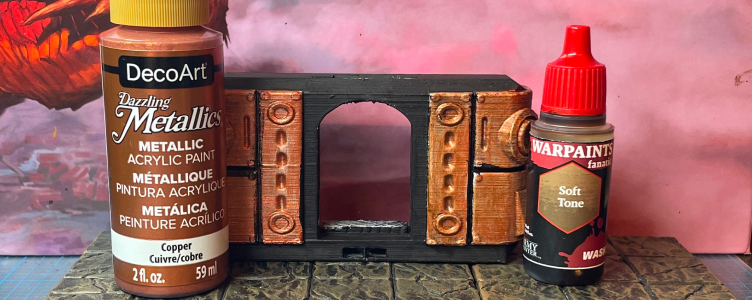
We know we ultimately need a copper color, but this DecoArt Copper is probably too red for our liking. However, this was an instance where the Soft Tone wash really helped. Still, we could make this one work if needed.
DM Ben loves ArmyPainter Speedpaint’s True Copper and Weapon Bronze colors, so those are likely to make the final cut (for just splashes of bronze as needed).
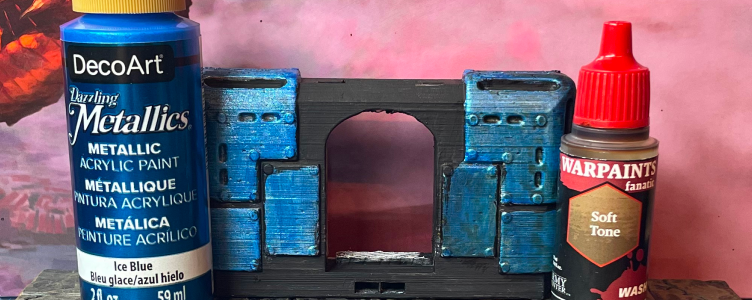
In our research, real-life train cars are typically a mishmash of different colors and designs (unless it’s a very specific type of train). So, it’s important that we don’t give every car exactly the same look. That’s why we wanted to try a non-traditional metal color like Ice Blue.
We thought this Ice Blue would be fun for a passenger car with a fancier exterior. We tested it on this metal industrial look and should have printed out a fancier end piece. We got the test look we needed, though.
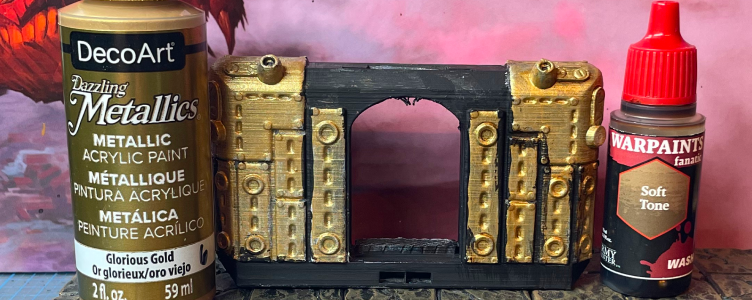
Lastly, we tried Glorious Gold. This was the most disappointing of the lot. It’s just too bright. The washed elements on the right are ok but this one would be used sparingly (if at all). Again, we will probably use ArmyPainter’s Greedy Gold when the situational element calls for it.
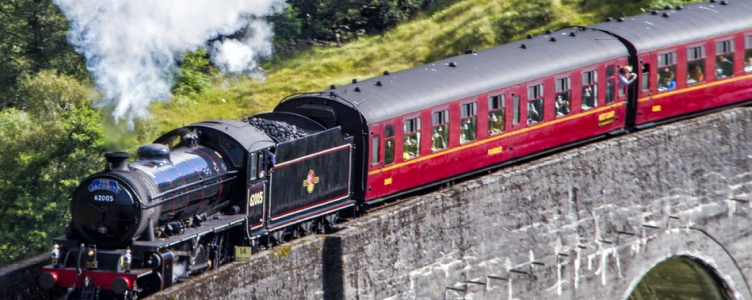
So now what? More tests! DM Ben is bummed we forgot to test Pokorny Paint’s Shallow Water Green (e.g., a dark green) and maybe even Deep Lava (e.g., a darker red). We plan to do those two colors over the weekend. We’re looking to see if we can get a Harry Potter Hogwarts train vibe.
We’re also going to try some contrasting greys (with Pokorny Paints Base Gray and Dungeon Gray) on a couple of the car undercarriage pieces. Then, we’ll add these door tests to those carriage tests and see how the colors look together.
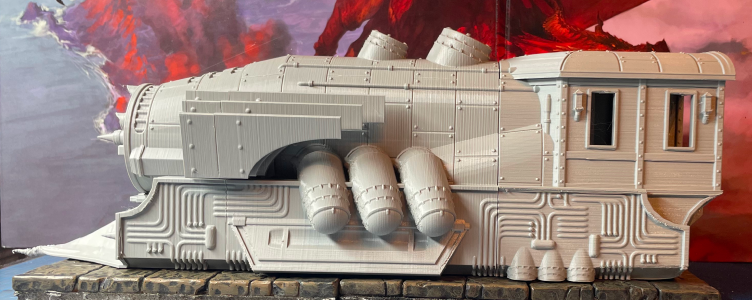
Even better, Laughing Bear Games should also be giving us our first engine paint job in the coming weeks, which should inspire what we do with the connecting train cars. Our pro painter partners really energize us here at 3DRPG, so stay tuned!
advertisement
View all results
advertisement
