advertisement
10 July 2025
Tomb Thursdays bring us so much joy these days. Watching an entirely new DnD gameboard-themed environment come to life more and more each week is such a darn rush. We’ve tested an alternative color scheme, and we think you’ll love it! Paint brushes, assemble!
While our core Aether Studios tomb terrain tiles already have an amazing Reaper color scheme and don’t require an enormous number of tedious steps, the overall decision was bothering us since the guide uses smaller, pricier Reaper paints. Then, out of nowhere, another craft paint Egyptian paint guide video popped up in our YouTube feed, and we just had to try it out.
The economics of it all are quite brutal: a small bottle of fancier hobby paint costs around $4.00. A larger bottle of traditional craft paint is about $1.15. With 3D prints absorbing a mighty amount of paint, your monthly hobby budget takes it on the chin pretty quickly.
Now, we’re not ripping pro paints by any means. We have complete sets of Speedpaints, Fanatic Paints, Green Stuff World, etc. We adore them all. These fine products have a place. However, when you’re painting a large number of overall tile pieces or a much larger scatter terrain, the dollars can matter.
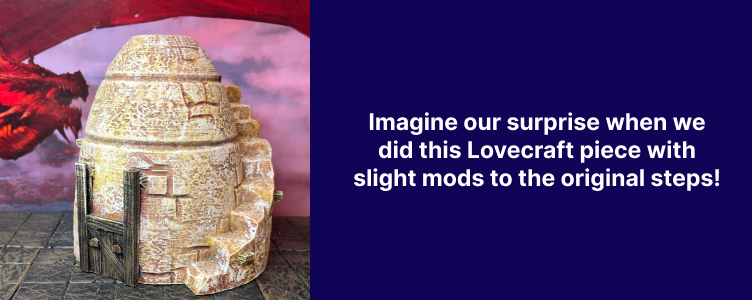
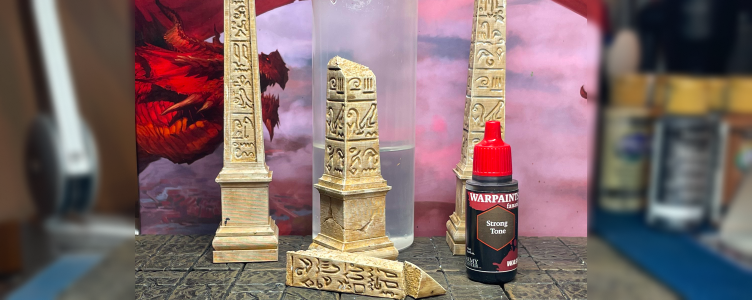
DM Ben was incredibly annoyed… to the point where he wouldn’t stop letting it be known around the office that we chose a great model paint guide without also offering some more affordable options. Now, we did stumble upon a quick and easy craft paint scheme during our initial tests and tried it out on this Iain Lovecraft Grain building.
Not bad. Not our favorite, but the final result convinced us we could pivot to this alternative Egyptian paint scheme on larger 3D-printed pieces as needed.
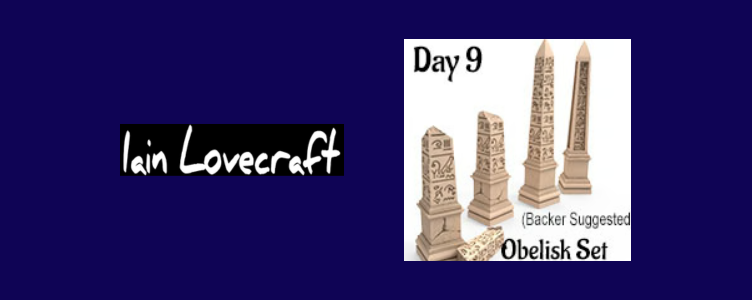
Our test models today come from Iain Lovecraft’s Desert Adventures Kickstarter. His work complements our core Aether Studios tomb tiles perfectly. You can’t go wrong owning STLs from both talented creators.
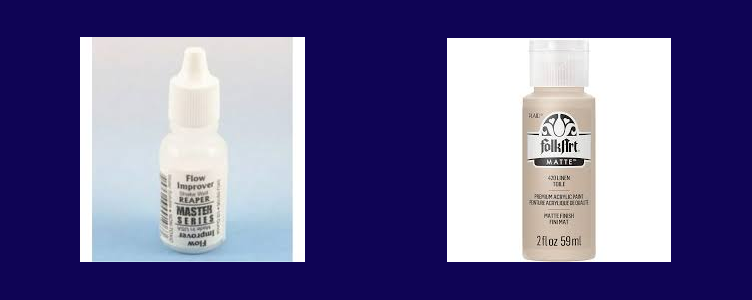
Then, out of nowhere, a TTRPG hobbyist YouTuber named Terrainify had a little-known video tutorial from five years ago entitled, “Ancient Ruins – Sandstone Theme Tutorial.” Like, how are we not going to click on that one?! We’re always a bit hesitant to do so because these guides often require a mixing of paints, and that drives us nuts because consistency can become such a frustrating hassle.
Still, we were pretty intrigued by his sample results and simplified steps. If only there were a camera on our faces as we were watching it, because we kept nodding like a bunch of penguins as it played. This intel can’t be real, can it?!. So, we immediately bought both of his suggested paints and tried them ourselves!
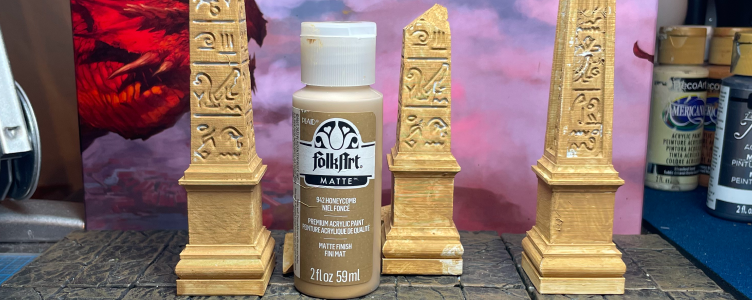
After thoroughly covering with a flat white primer, the first layer is FolkArt’s Honeycomb. Their paint is quite thick, so the author wisely suggested diluting it slightly to make it go on a bit smoother. We intentionally left some tiny flecks white to show through because that effect seems more authentic to us.
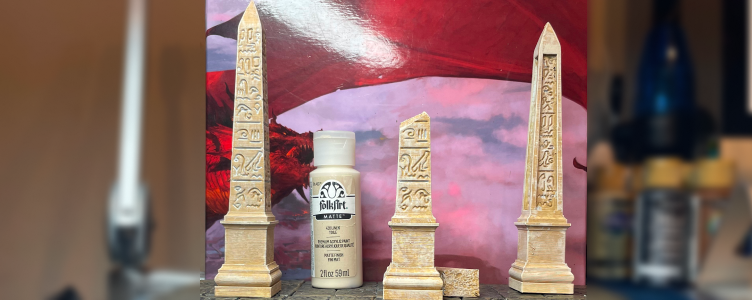
From there, we’re going to drybrush some FolkArt Linen Toile, again watering it down slightly so that the paint isn’t too thick. We also leave some of the original, darker brown exposed to represent random shadows. We’re loving it!
The last step could be seen as optional, but adding a very light and spotty darker wash to it is a nice final touch. Once again, by simply adding a little water to the wash, we achieve a little more coverage overall and mileage out of our tiny bottle, while ensuring it reaches all the recesses of our DnD desert models.
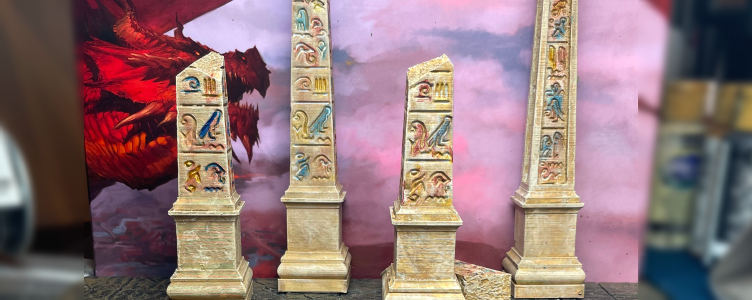
Lastly, you can do some light drybrushing with various colors to give all those markings a little pop. We prefer randomizing the colors and applying a lighter touch, as opposed to layering, because desert climates are incredibly harsh, and nothing in full color stays that way for very long. Trust us – 3DRPG Studios is based in sunny Arizona, and color fade is the norm here.
And when we first watched Terrainfy’s video, we thought, “No way, his scheme is too good to be true.” Boy howdy, were we wrong. They came out great!
Here are the insanely easy, summarized Egyptian desert terrain paint steps:
Again, always remember that craft paint is thicker than pro-hobby paints, so mixing in a little water to the Honeycomb, Linen, and Strong Tone wash makes a noticeable difference in terms of better coverage.
We ran out of time to try this alternative desert paint scheme on one of our Tomb Tiles, but did apply it to some free-standing Egyptian scatter terrain pieces. We’ll share those with ya next time!
advertisement
sponsored