advertisement
3 July 2024
We’ve got a treat for you today! It’s time to focus on one of the most important and trickiest parts of any cavern piece – the water effects!

We’re especially jazzed to show you this water effect step because we’ve had lousy luck previously. However, our research, new products, and test pieces delivered some excellent results this time!
A quick check-in on our Cavern Paint Guide steps:
We teased Step 8 in our Part 4 post, but we’ll expand on it today because it’s such a critical area for this cavernous terrain.
Thankfully, Dwarven Forge found Stefan Pokorny produced an old-school water effects video many moons ago, but the steps he shares are spot on here (and look absolutely fabulous). So rather than having you watch the video 30+ times, we thought sharing the steps here in blog form would be helpful. Still, be sure to watch it a couple of times.
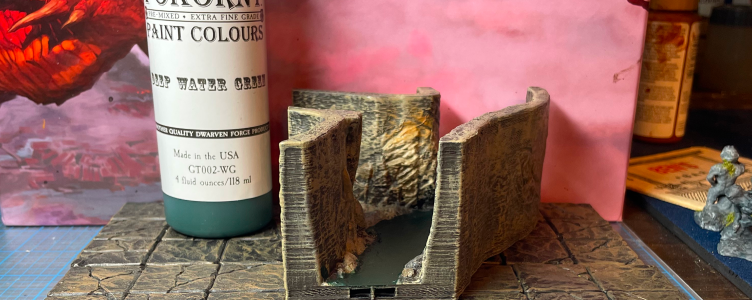
First, apply your base watercolor using one of our favorite Pokorny Paint colors, Deep Water Green. You will just layer this onto any water flow portions of your Milestone Heroes tiles. Dwarven Forge is known for its watercolor scheme; this first paint color is the foundation. We just love it.
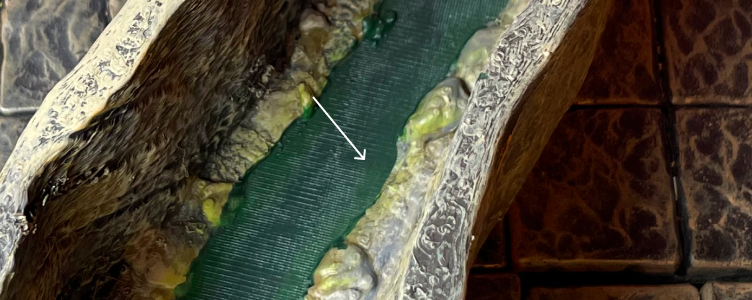
Once that is dry, we’ll add some depth to the water pieces by applying some Shallow Water Seaweed Green. This color is applied as a heavy drybrush just to the edge of your water. Alas, we don’t have a great picture for this step because it’s a bit tricky to pick up “on film.” The shadow effect is worth it, and you’ll definitely see it once the piece is fully painted.
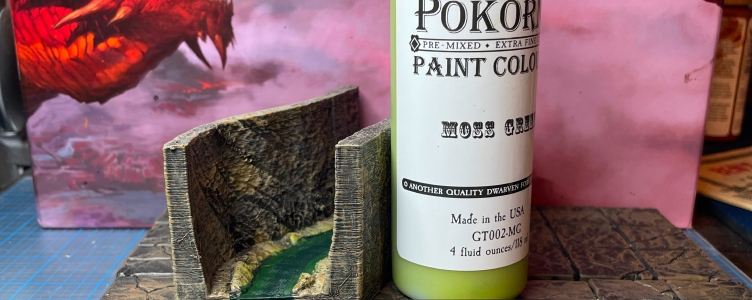
The next step is introducing green moss to each piece’s shoreline. The adventurers are in a deep, dark, dank place, so naturally, there has to be algae here and there. We used Pokorny Paints Moss Green for this step — randomly apply a heavier, spotted drybrush on parts of the water edging.
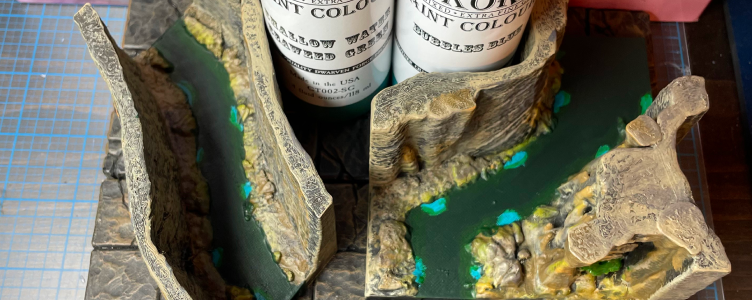
Now, you will do some free-hand, random bubble spots on your water using Bubbles Blue. Optionally, you can outline the edge outer edge of the bubbles with Shallow Seaweed Green. Even better, you can wet blend some bubbles with that same Seaweed Green to cloudy it up a little. Our best advice is to avoid any sorta patterns or doing too many bubbles. Less is always more with these subtle paint touches.
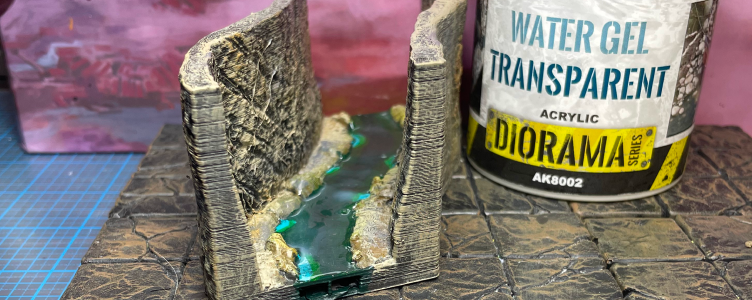
Here’s where the rubber meets the road. It’s time to apply the actual water effects material. This step has always been a pain point for us because no matter what we tried, the water effect would ultimately crater in due to hidden air bubbles (from pouring the material). Clear nail polish will certainly work, but we highly recommend picking up a jar of AKI Interactive’s Transparent Water Gel effects. It’s easy to apply, there’s no smell, and we rarely get air bubbles.
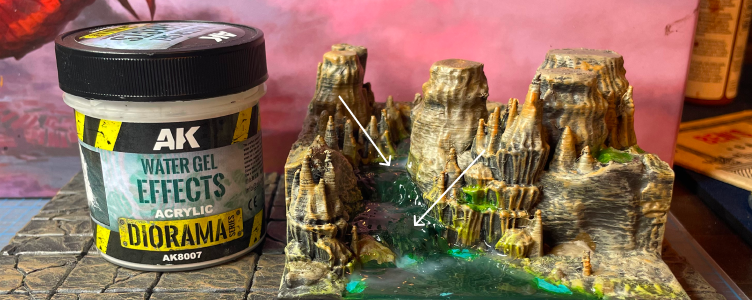
AKI also includes another water foam effect product that will help you create ripples (for things like falling water or waterfalls). Alas, we couldn’t show you a picture of this at press time, but we’ll try to include one next week. Look how great the water looks here, though!
Next week, we’ll put the finishing touches and wrap up our third paint guide of the series!
advertisement
View all results
advertisement
